|
|
Thread: 20b repu
[' This thread is 3 pages long: (1)
2
3 '] |
papsmagu

  
Revvin Up
Posts: 96
|
 posted September 26, 2013 12:12 PM
 |
 Edited By: papsmagu on 26 Sep 2013 12:13 Edited By: papsmagu on 26 Sep 2013 12:13 |
20B REPU
well after about 6-7 months of driving her around, i decided to take on a new challenge. she is now under the knife again.....getting a 20B...too lazy to start a new thread so here is the link to the build thread on the rx7club forum.
http://www.rx7club.com/old-school-other-rotary-63/20b-repu-1046733/
for those that dont know my truck...here is a link to the build thread on this forum
http://www.mazdarepu.com/board/viewthread.php3?FID=1&TID=2987
any questions, feel free to ask. i will try and asnwer tot he best of my ability but i am really going at this blindly.
enjoy
simon
|
|
Brad

    
Rotorhead
Posts: 1672
|
 posted September 26, 2013 04:19 PM
 |
|
Now that's bad ass! A great project and thanks for sharing! I wanna ride in that truck.
A few questions:
Do you know what size bridgeport it is? Standard, Full J, secondaries only?
Have you ever ridden in a car with a bridgeport motor? It kicks and bucks at lower rpms with light to no throttle. Just a friendly heads up. The EFI will help with this.
Do you know if it has n/a rotors in it or the original turbo rotors?
The T][ tranny may not be up to handling that motor, and the gear ratios are a bit too spread out. I've seen a 20b peripheal port motor break them on a regular basis. A Jerico may be the best bet for strength/price/parts availability. Or an EMCO flat shift transaxle :)
Will you be increasing the radiator and oil cooler size?
Will it be ready for sevenstock in November?
Thanks and keep up the great work?
____________
-brad-
74 REPU Lawn Green
81 Rx-7 racecar. 12a J-
Bridge
|
|
Papsmagu

  
Revvin Up
Posts: 96
|
 posted September 27, 2013 03:53 AM
 |
|
Thanks for te compliments
Bridgeport is standard b-port with NA rotors
BP was not my first choice. I have been in a BP and I understand low RPM,s suck but I got a great deal on the engine and it was built by Kilo racing. I couldn't pass up the deal.
Thanks for the advise on the tranny. I will keep the Jerico in mind when the TII blows up.
Both oil cooler and radiator were upgraded on the original build. I certainly have the room to upgrade if I find out either of them are not up to the job. When I built the truck I tried to build it with the 20b in mind so that when I finally went 20b, the additional parts needed are kept to a minimum
I don't think I will make it to seven stock, but maybe next year. Always something I want to do. I want to have it done before November if possible so I can enjoy it during the cooler months of FL weather.
I will keep you posted on the progress
quote:
Now that's bad ass! A great project and thanks for sharing! I wanna ride in that truck.
A few questions:
Do you know what size bridgeport it is? Standard, Full J, secondaries only?
Have you ever ridden in a car with a bridgeport motor? It kicks and bucks at lower rpms with light to no throttle. Just a friendly heads up. The EFI will help with this.
Do you know if it has n/a rotors in it or the original turbo rotors?
The T][ tranny may not be up to handling that motor, and the gear ratios are a bit too spread out. I've seen a 20b peripheal port motor break them on a regular basis. A Jerico may be the best bet for strength/price/parts availability. Or an EMCO flat shift transaxle :)
Will you be increasing the radiator and oil cooler size?
Will it be ready for sevenstock in November?
Thanks and keep up the great work?
|
|
TimPA136

   
Redlining
Posts: 325
|
 posted September 28, 2013 11:45 AM
 |
|
any questions, feel free to ask.
simon
No questions, just extremely interesting to say the least.
Thanks for posting..........bad ass for sure
Tim
|
|
papsmagu

  
Revvin Up
Posts: 96
|
 posted September 30, 2013 04:19 AM
 |
|
quote:
any questions, feel free to ask.
simon
No questions, just extremely interesting to say the least.
Thanks for posting..........bad ass for sure
Tim
tim,
i assume by your name you are in PA? i studied in PA for pre-enginering then i was to go to Penn State to complete my degree but could not deal witht he cold. finished in miami, where its nice and not.
anyways, got the motor in and found out that rear mounts will not work because they will be in conflict with the drag link. gonna use a gslse front cover with the front motor mounts. picking up the motor today to take to my house to make the swap. i'll post up picks soon.
thanks for the compliments
|
|
papsmagu

  
Revvin Up
Posts: 96
|
 posted October 01, 2013 09:05 AM
 |
|
i have descided not be lazy and post updates here as well.
Made some progress in the last couple of days. Decided not modify the drag link so the oil pan was modified to clear the drag link. It looks a lot closer in the pics than it really is, plus the motor is not in its final resting point. Motor should come up another ½� to ¾�

Due to the drag link, motor mounts and header it was next to impossible to install the motor mounts in the rear of the motor as originally intended (At least I could not figure it out). So I sourced a GSLSE front cover from a good buddy of mine and swapped it out for the 20B cover. The front cover was free as I kidnapped his oil cooler and kept it for ransom.


Only problem with the front cover is that it projects out further than the 20B front cover. It’s a good 1� to 1-1/2� longer. Looks like the front of the oil pan will require modification. Now only thing left to complete is new motor mount brackets in the front and re-install everything. Then I can start exhaust and intake manifolds

|
|
TimPA136

   
Redlining
Posts: 325
|
 posted October 05, 2013 07:53 AM
 |
|
Front motor mount bracket
tim,
i assume by your name you are in PA?
Well no, but I spent a week this past July in Somerset, PA.
with some friends.
I didn't catch that bitchen front bracket mount right away
very cool.
|
|
papsmagu

  
Revvin Up
Posts: 96
|
 posted October 11, 2013 11:27 AM
 |
|
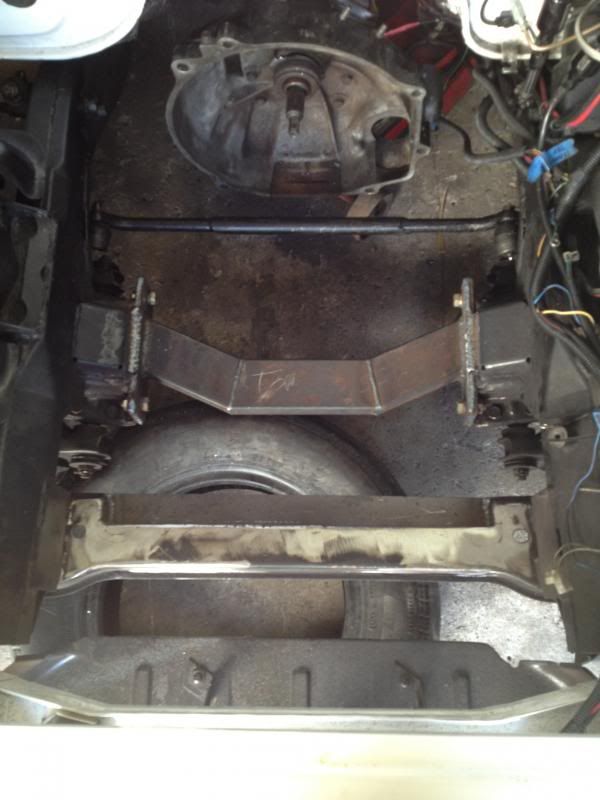
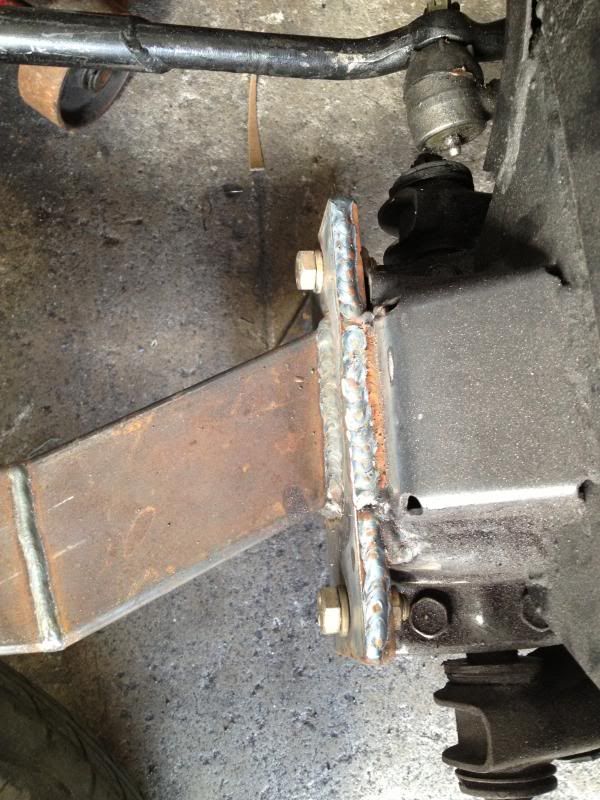
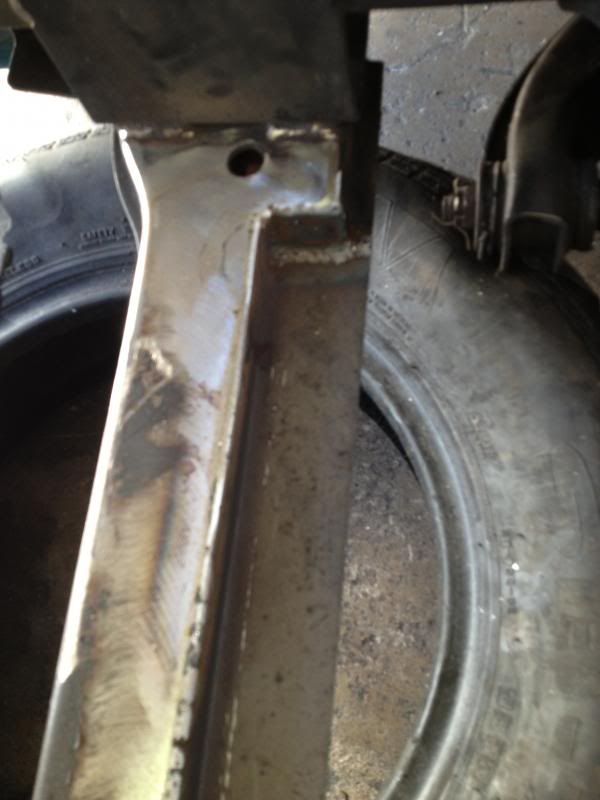
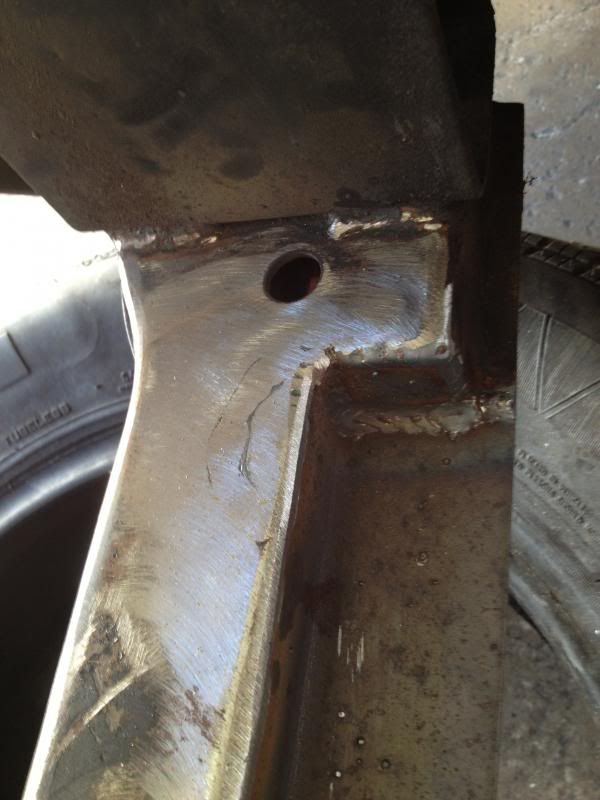
The front cross member has been boxed for rigidity and that the new center cross member has also been welded in lieu of having a mechanical connection. I thought the welded connection would be much stronger and not have a chance to come loose with prolonged vibrations.
|
|
papsmagu

  
Revvin Up
Posts: 96
|
 posted October 21, 2013 08:20 AM
 |
|
Ok so the motor mounts are done and the motor and tranny are finally secured to the REPU and in their final position. As stated before the oil pan had to be modified. Took a GSLSE oil pan and mated it to the 20B oil pan.


The shifter hole is also complete and now resides approximately 4� further back the original location

|
|
papsmagu

  
Revvin Up
Posts: 96
|
 posted October 21, 2013 08:22 AM
 |
|
Here are some pics of the motor mounts, ignore the square tubing below the Rotary Works motor mount bracket…..its just temporary to get the right height of the motor.


|
|
Brad

    
Rotorhead
Posts: 1672
|
 posted October 21, 2013 10:32 AM
 |
|
Looking good!
Just a quick note. When you took the front cover off did you take steps to ensure a torrington bearing in the front stack didn't slip behind the end play spacer?
Did you check the end play afterwards? Just trying to help.
http://www.mazdatrix.com/faq/pulley.htm
|
|
papsmagu

  
Revvin Up
Posts: 96
|
 posted October 24, 2013 06:05 AM
 |
|
quote:
Looking good!
Just a quick note. When you took the front cover off did you take steps to ensure a torrington bearing in the front stack didn't slip behind the end play spacer?
Did you check the end play afterwards? Just trying to help.
http://www.mazdatrix.com/faq/pulley.htm
Any help is much appreciated.
we used a ratcheting strap anchored to the ac bracket on one side of the motor and the exhaust header stud on the other. wrapped it around the flywheel and cranked away. it was very tight. it never had a chance of moving. front nut was removed with air tools to avoid any movement.
again, i welcome all comments and suggestions. i am no expert and love to learn new things.
|
|
papsmagu

  
Revvin Up
Posts: 96
|
 posted November 07, 2013 03:29 AM
 |
|
Some progress to report…not much progress but some. Hopefully next week, I can get the truck back, mock everything up and send out the parts to power coating. Had a 3 to one collector made for the exhaust. Due to the REPU crossmember I thought it would be better to have it made flat rather than the typical stacked collectors.


Also made some progress on the intake manifold. The ITB’s will sit at approximately 30 degree angle.


As I have more progress I will update the thread, for now this is all I have.
|
|
papsmagu

  
Revvin Up
Posts: 96
|
 posted November 14, 2013 04:37 AM
 |
|
Intake is complete and mocked up. Radiator supports complete. Monday will begin the header fabrication.


|
|
papsmagu

  
Revvin Up
Posts: 96
|
 posted February 24, 2014 04:15 AM
 |
|
Wow haven't posted here in a while. anyways project is going along nicely. hope to have it done in the next couple of months. keeping my fingers crossed.
Got some work done over the weekend. I know it doesn’t look like much but I feel like a accomplished something. I got the bosch 044 pump installed with filter, return and feed lines. Also connected all wiring to the pump. Got the tranny tail shaft installed and sealed. Installed the water pump housing, water pump. Also, got some more wiring done but that is on hold until my new tool arrives tomorrow. Anyways, took some pics of the motor as it sits right now. I have to send the LIM out to coating as the inside face of the manifold looks like crap. Outside face is sexy that is why I took a picture of it. ahahahahahah anyways enjoy the pics.


|
|
papsmagu

  
Revvin Up
Posts: 96
|
 posted March 20, 2014 04:45 AM
 |
|
Well it’s been a little more than 6 months and I have finally hit one of my milestones of the build. Yesterday I pressurized the fuel system and everything is leak free! It wasn’t without a lot of trouble shooting. First I could not figure out why my fuel pump was not turning on? Started at the pump and found no power. Checked the fuse and I had power. Something between the fuse and the pump was shorting….what I didn’t remember is that the pump runs from a hidden kill switch!!!! That took about an hour of troubleshooting. Once I turned on the switch, the pump pressurized and I had pressure. After a brief inspection I find a leak coming out of the top of the fuel tank….dropped the fuel tank and found the return hose to be broken.
That fixed and pressurized the system and hoary!!! No leaks!

Also installed the oil cooler and oil cooler lines. Installed radiator and fan. Went to install the starter and found that Autozone had ordered me the wrong one! Back to the drawing board on that one. Just waiting on my spark plugs, an injector clip and my MSD wires to arrive, all of which should be by the end of the week. Lastly, I didn’t like how the velocity stacks came out. The inside was not polished. I decided to have the inside anodized in blue like the pulleys and leave the outside chrome….lets wee what that looks like????? In the meantime, this is how I left the engine last night.

|
|
Lasse

  
Revvin Up
Posts: 97
|
 posted March 23, 2014 01:10 PM
 |
|
Really cool to see this...
I thought someone should put a 20B in a repu years ago...
And here i see it...
Good job there... It looks really nice... Hope we can get a short movie later when its rew an run...
____________
Rotation is my life !!! Said the rotor to the housing...
|
|
papsmagu

  
Revvin Up
Posts: 96
|
 posted March 26, 2014 09:52 AM
 |
|
quote:
Really cool to see this...
I thought someone should put a 20B in a repu years ago...
And here i see it...
Good job there... It looks really nice... Hope we can get a short movie later when its rew an run...
thank you....she is alive and well. have to finish buttoning up some things and she should be on the road soon. here is a vid i took of her, dont really know how to post vid so if i screw it up...sorry
[URL=http://i3.photobucket.com/albums/y54/papsmagu/20B%20REPU/IMG_1920_zpsefbf57c3.mp4]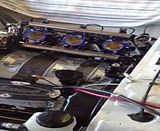 [/URL] [/URL]
|
|
papsmagu

  
Revvin Up
Posts: 96
|
 posted March 26, 2014 09:55 AM
 |
|
|
well that did not work???? Anyone care to upload the vid for me? i can send it to you via e-mail or give you a link to my photobucket account?
|
|
Brad

    
Rotorhead
Posts: 1672
|
 posted March 26, 2014 10:33 AM
 |
|
|
| All times are PST (US)
[' This thread is 3 pages long: (1)
2
3 '] |
|
|


